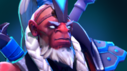
BIO
Never one to turn his back on a fight, Rigwarl was known for battling the biggest, meanest scrappers he could get his hands on. Christened Bristleback by the drunken crowds, he waded into backroom brawls in every road tavern between Slom and Elze, until his exploits finally caught the eye of a barkeep in need of an enforcer. For a bit of brew, Bristleback was hired to collect tabs, keep the peace, and break the occasional leg or two (or five, in the case of one unfortunate web-hund).
After indulging in a night of merriment during which bodily harm was meted out in equal parts upon both delinquent patrons and his own liver, Bristleback finally met his match. "Your tusks offend me, sir," he was heard to drunkenly slur to one particularly large fellow from the northern wastes whose bill had come due. What followed was a fight for the ages. A dozen fighters jumped in. No stool was left unbroken, and in the end, the impossible happened: the tab went unpaid. Over the weeks that followed, Bristleback's wounds healed, and his quills grew back; but an enforcer's honor can be a prickly thing. He paid the tab from his own coin, vowing to track down this northerner and extract redemption. And then he did something he'd never done before--he actually trained, and in so doing made a startling discovery about himself. A smile peeled back from his teeth as he flexed his quills. Turning his back to a fight might be just the thing.
INTRODUCTION
Bristleback can be considered atanker and also can be build to be acarry hero. A tanker because he have the ability to reduce enemy's damage he receive. And he can also become a carry because he have the ability to increase his damage, and he also have the slow ability to help him chase his target.
After indulging in a night of merriment during which bodily harm was meted out in equal parts upon both delinquent patrons and his own liver, Bristleback finally met his match. "Your tusks offend me, sir," he was heard to drunkenly slur to one particularly large fellow from the northern wastes whose bill had come due. What followed was a fight for the ages. A dozen fighters jumped in. No stool was left unbroken, and in the end, the impossible happened: the tab went unpaid. Over the weeks that followed, Bristleback's wounds healed, and his quills grew back; but an enforcer's honor can be a prickly thing. He paid the tab from his own coin, vowing to track down this northerner and extract redemption. And then he did something he'd never done before--he actually trained, and in so doing made a startling discovery about himself. A smile peeled back from his teeth as he flexed his quills. Turning his back to a fight might be just the thing.
INTRODUCTION
Bristleback can be considered atanker and also can be build to be acarry hero. A tanker because he have the ability to reduce enemy's damage he receive. And he can also become a carry because he have the ability to increase his damage, and he also have the slow ability to help him chase his target.
| PROS | CONS |
| Tanky | Have spammable skill which will trigger enemy's Magic Wand |
| A great slower / chaser | Have no disable |
| Low cooldown on spells |

ROLE
Melee - Durable - Initiator - Disabler
| LEVEL | 1 | 15 | 25 | ||
|---|---|---|---|---|---|
| HIT POINTS | 568 | 1,153 | 1,951 | SIGHT RANGE | 1800 / 800 |
| MANA | 182 | 692 | 1,316 | ATTACK RANGE | 128 |
| DAMAGE | 51-62 | 83-93 | 125-135 | MISSILE SPEED | N/A |
| ARMOR | 3 | 7 | 12 |
ABILITIES
1. Viscous Nasal Goo

| MANA COST: 30/30/30/30 | COOLDOWN: 1.50 |
| ABILITY: UNIT TARGET | AFFECTS: ENEMY UNITS |
| DURATION: 5 | ARMOR LOSS: 1 / 1 / 2 / 2 |
| BASE MOVEMENT SLOW: 20% | SLOW PER STACK: 3% / 6% / 9% / 12% |
| STACK LIMIT: 4 | CONTOH: DIHAPUS10 |
This skill is a great chasing skill. With stacking this skill into one enemy, you can harass hime asily because he will have a very slow movement and cannot run away.
2. Quill Spray

| MANA COST: 35/35/35/35 | COOLDOWN: 3 |
| ABILITY: NO TARGET | DAMAGE: PHYSICAL |
| RADIUS: 625 | QUILL BASE DAMAGE: 20 / 40 / 60 / 80 |
| QUILL STACK DAMAGE: 30 | STACK DURATION: 14 |
| MAX DAMAGE: 400 |
This skill is spammable. Deal small damage but will become a painful nuke because you always cast this every time. This will also trigger your ultimate which increase your damage to harass enemies more.
3. Bristleback

| ABILITY: PASSIVE | SIDE DAMAGE REDUCTION: 8% / 12% / 16% / 20% |
| BACK DAMAGE REDUCTION: 16% / 24% / 32% / 40% |
This is your defense skill to become a tank. With this skill, your body will become hard and enemy will have a hard time knocking you down. And also you will automatically release your Quill Spray if you receiva damages.
4. Warpath

| ABILITY: PASSIVE | BASE DAMAGE BONUS: 20 / 25 / 30 |
| DAMAGE PER STACK: 20 / 25 / 30 | BASE MOVEMENT BONUS: 5% / 7% / 10% |
| MOVEMENT PER STACK: 1% / 2% / 3% | STACK DURATION: 10 / 10 / 10 |
| MAX STACKS: 5 |
You get bonus damage and movement speed each time you cast any skill. So you must spam your Quill Sray and the Nasal Goo to increase your damage and movement speed.
SKILLBUILD

Level 1: Quill Spray
Level 2: Viscous Nasal Goo
Level 3: Quill Spray
Level 4: Viscous Nasal Goo
Level 5: Quill Spray
Level 6: Warpath
Level 7: Quill Spray
Level 8: Viscous Nasal Goo
Level 9 : Viscous Nasal Goo
Level 10: Bristleback
Level 11: Warpath
Level 12: Bristleback
Level 13: Bristleback
Level 14: Bristleback
Level 15: Stats
Level 16: Warpath
Level 17-25: Stats
Why maxed Quill Spray first? This is your main nuke, you will need this for ganking, farming, and killing on early mid game.
Why maxed Viscous Nasal Goo before Bristleback? You need Viscous Nasal Goo more than the Bristleback because you will need to chase enemy hero on early-mid game.
STRATEGY
Early Game
Try to spam your skill Quill Spray once in a while. It will harass your enemy on the lane. Also don't forget to get the last hits and deny. You need golds to buy some items. And if you feel your enemy needs to be harass more, you need to cast Viscous Nasal Goo too and attack him. Beware from enemy's gank. You may buy some wards and place it on the rune spot to view if there is any enemy comes to you and you should retreat immediately if you see enemy is coming. Last hitting as Bristleback is not so hard, you have a nice early damage to do it, so keep focus and last hits the low HP creep.
Mid Game
Mid game is the ganking time! Everybody will roam around the map and find somebody to kill. So always keep your eye on the important place from where the enemy can comes up and always be careful. Always remember to replace the ward if the time is up and also always keeps an eye on the vision from the wards.
You have some ganking skill here. So if you want to also participate in a gank, what you need to do is:
1. Comunicate with your teammates about who should be ganked, you should focus fire on 1 hero in a gank, because if you don't communicate well you may attack A and your teammates attack B, and that is a bad gank and can lead to failure on getting the kill.
2. Use the Nasal Goo to slow down the enemy, and also reduce his armor
3. Use Quill Spray for every 3 seconds to increase your damage and also harass enemy with the Spray damage
4. Attack the enemy with your increased attack damage from your ultimate
5. If you fain in the gank, retreat immediately, I believe you can escape because you have reduced enemy's damage from your 3rd skill
7. If there is enemy that is run away, you can chase him with your Nasal Goo
8. Remember to push enemyy's tower after a successful gank
9. Remember that your spamming skill trigger enemy's magic wand so they will got the charge maxed easily.

Late Game
Late game is the time for big teamfights. What you need to do is apamming all your skills. Spam the Viscous Nasal Goo into squishy enemy first. And also don't forget to spam your Quill Spray to increase your damage more. And then after that you can right click the enemy.
If you already bought good item, always use it on every teamfight. You may already bought a Blademail so don't forget to activate it through the battle. With the more stacking of Viscous Nasal Goo, your target become so much more vulnerable. it will be good for your teammates because the outcoming damage will increase dramatically.
Remember that you are the tanker for your team. You should become the man that is in the front line of your team's line-up. And should be brave to attack everything in the way. You may also buy some survivability items like Tarrasque to increase your defense more. And if you are terribly lose the teamfight, retreat immediately.
And if your team won the teamfight, you have two options:
1. You can get the Aegis for your team's main hero or
2. Your team can push enemy base and destrouy their buildings. Choose wisely!
ITEMS BUILD
1. Power Threads
Total cost: 1400
Recipe: Gloves of Haste, Boots of Speed, Belt og Giant Strength/ Robe of Magi/ Band of Elvenskin

Why Power Threads? It will gives you attack speed, thats what you need, attack speed and damages. Power threads is laso a flexible shoes, you can change it to STR, AGI, or INT for what you need.
2. Blade Mail
Total cost: 2200
Recipe: Broadsword + Chainmail + Robe of Magi

Why Blade Mail? After you initiate a teamfight, your opponent is likely to target you because they will hate you. So you can reflect their damege using this item.
3. Black King Bar
Total cost:: 3900
Recipe: Ogre Axe, Mithril Hammer, Recipe

Why Black King Bar? It gives you survivability in a teamfight because you will get magic immunity during teamfight.

Why Shiva's? The movement speed and attack speed reduction from this shivas guard will greatly reduces enemy's power in the teamfight. And combined with your Sigil, the sloer will be so high and will likely to dominate enemy in every teamfight.
5. Heart of Tarrasque
Total cost: 5500
Recipe: Reaver + Vitality Booster

Why Heart of Tarrasque? The survivability from this item is the core of your survival during any teamfight. Buy this and keep alive from all enemy's force.
GOOD ALLIES
1. Carries
(Example: Magine, Void, Luna)


Early Game
Try to spam your skill Quill Spray once in a while. It will harass your enemy on the lane. Also don't forget to get the last hits and deny. You need golds to buy some items. And if you feel your enemy needs to be harass more, you need to cast Viscous Nasal Goo too and attack him. Beware from enemy's gank. You may buy some wards and place it on the rune spot to view if there is any enemy comes to you and you should retreat immediately if you see enemy is coming. Last hitting as Bristleback is not so hard, you have a nice early damage to do it, so keep focus and last hits the low HP creep.
Mid Game
Mid game is the ganking time! Everybody will roam around the map and find somebody to kill. So always keep your eye on the important place from where the enemy can comes up and always be careful. Always remember to replace the ward if the time is up and also always keeps an eye on the vision from the wards.
You have some ganking skill here. So if you want to also participate in a gank, what you need to do is:
1. Comunicate with your teammates about who should be ganked, you should focus fire on 1 hero in a gank, because if you don't communicate well you may attack A and your teammates attack B, and that is a bad gank and can lead to failure on getting the kill.
2. Use the Nasal Goo to slow down the enemy, and also reduce his armor
3. Use Quill Spray for every 3 seconds to increase your damage and also harass enemy with the Spray damage
4. Attack the enemy with your increased attack damage from your ultimate
5. If you fain in the gank, retreat immediately, I believe you can escape because you have reduced enemy's damage from your 3rd skill
7. If there is enemy that is run away, you can chase him with your Nasal Goo
8. Remember to push enemyy's tower after a successful gank
9. Remember that your spamming skill trigger enemy's magic wand so they will got the charge maxed easily.

Late Game
Late game is the time for big teamfights. What you need to do is apamming all your skills. Spam the Viscous Nasal Goo into squishy enemy first. And also don't forget to spam your Quill Spray to increase your damage more. And then after that you can right click the enemy.
If you already bought good item, always use it on every teamfight. You may already bought a Blademail so don't forget to activate it through the battle. With the more stacking of Viscous Nasal Goo, your target become so much more vulnerable. it will be good for your teammates because the outcoming damage will increase dramatically.
Remember that you are the tanker for your team. You should become the man that is in the front line of your team's line-up. And should be brave to attack everything in the way. You may also buy some survivability items like Tarrasque to increase your defense more. And if you are terribly lose the teamfight, retreat immediately.
And if your team won the teamfight, you have two options:
1. You can get the Aegis for your team's main hero or
2. Your team can push enemy base and destrouy their buildings. Choose wisely!
ITEMS BUILD
1. Power Threads
Total cost: 1400
Recipe: Gloves of Haste, Boots of Speed, Belt og Giant Strength/ Robe of Magi/ Band of Elvenskin
| Active: Switch Attribute - Changes selected attribute between Strength, Agility and Intelligence. Flat movement speed bonuses from multiple pairs of boots do not stack. + 55 Movement Speed + 8 Selected Attribute + 30 Attack Speed |
2. Blade Mail
Total cost: 2200
Recipe: Broadsword + Chainmail + Robe of Magi
| Active: Damage Return - Returns any damage you take to the unit that dealt the damage. Lasts 4.5 seconds. + 22 Damage + 5 Armor + 10 Intelligence Manacost: 25 Cooldown; 22 |
3. Black King Bar
Total cost:: 3900
Recipe: Ogre Axe, Mithril Hammer, Recipe
| Active: Avatar - Grants magic immunity. Duration and cooldown decrease with each use. Some Ultimate abilities are able to disable through Black King Bar. + 10 Strength + 24 Damage DURATION: 10/9/8/7/6/5 Cooldown: 80 |
4. Shiva's Guard
Total cost: 4700Recipe: Plate Mail + Mystic Staff + Recipe
| Active: Arctic Blast - Emits a freezing wave that does 200 damage to enemies and slows their movement by -40% for 4.0 seconds. Passive: Freezing Aura - Reduces attack speed on enemies. Multiple instances of Freezing Aura do not stack. + 30 Intelligence + 15 Armor AURA SLOW: 25% Manacost: 100 Cooldown: 30 |
5. Heart of Tarrasque
Total cost: 5500
Recipe: Reaver + Vitality Booster
| Passive: Health Regeneration - Restores a percentage of max health per second. This ability is disabled if damage is taken from an enemy Hero or Roshan within the last 4 seconds if your hero is melee or 6 seconds if your hero is ranged. + 40 Strength + 300 Health HEALTH RESTORED: 2% Cooldown: 6 |
GOOD ALLIES
1. Carries
(Example: Magine, Void, Luna)
You initiate the teamfight and also tank the damages, and the will deal damages to the enemy!